
Upload Files to Azure Blob Storage from Business Central Using AL
Share this Article
In this Article
Share this Article
In this Article
In this blog, we will see how to upload files from Microsoft Dynamics 365 Business Central to Azure Blob Storage using AL.
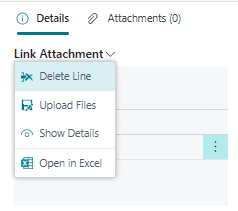
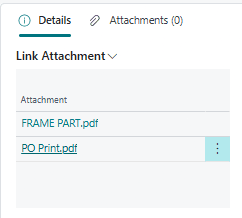
The solution allows users to upload multiple files at once from a Business Central page. The actual files are stored in Azure Blob Storage, while the file information and Blob URL are maintained in a custom Business Central table.
The implementation uses:
FileUpload to receive files selected by the user
InStream to read the uploaded file
ABS Blob Client to communicate with Azure Blob Storage
A custom Integration Setup table for Azure configuration
A custom Link Attachment table to maintain file information
A custom FactBox page to display uploaded attachments
1. Upload Files Action
The first step is to add an action to the Business Central page from where users can upload files.
       fileuploadaction(UploadFile)
            {
                Caption = 'Upload Files';
                ApplicationArea = All;
                ToolTip = 'Upload Files';
                Image = SaveViewAs;
                AllowMultipleFiles = true;

                trigger OnAction(files: List of [FileUpload])
                var
                    PurchHeader: Record "Purchase Header";
                begin
                   Rec.UploadFileToBlobStorageWithFolder(files, Rec);
                end;
            }
Explanation
The fileuploadaction creates an action that allows the user to select files from the Business Central client.
The important property here is:
AllowMultipleFiles = true;
This allows the user to select multiple files in a single operation.
The selected files are received by the OnAction trigger as:
files: List of [FileUpload]
The files are then passed to the main upload procedure:
Rec.UploadFileToBlobStorageWithFolder(files, Rec);
So the basic flow starts with:
User selects files → FileUpload list → Upload procedure
2. UploadFileToBlobStorageWithFolder
This is the main procedure responsible for uploading the files to Azure Blob Storage.
 //Multiple Upload Files
    procedure UploadFileToBlobStorageWithFolder(Files: List of [FileUpload]; var LinkAttachmentRec: Record "Link Attachment")
    var
        IntegrationSetup: Record "Integration Setup";
        StorageServiceAuthorization: Codeunit "Storage Service Authorization";
        ABSBlobClient: Codeunit "ABS Blob Client";
        FileManagement: Codeunit "File Management";
        Authorization: Interface "Storage Service Authorization";
        InStr: InStream;
        BlobPath, FolderName, FileName, Extension : Text;
        AccessKeySecretTxt: SecretText;
        File: FileUpload;
    begin
        IntegrationSetup.Get();
        AccessKeySecretTxt := IntegrationSetup."Access Key";
        Authorization := StorageServiceAuthorization.CreateSharedKey(AccessKeySecretTxt);
        ABSBlobClient.Initialize(IntegrationSetup."Account Name", IntegrationSetup."Container Name", Authorization);
        FolderName := GetFolderName(LinkAttachmentRec);
        foreach File in Files do begin
            File.CreateInStream(InStr);
            FileName := File.FileName;
            Extension := FileManagement.GetExtension(FileName);
            //Extension := CopyStr(FileName, StrPos(FileName, '.') + 1, StrLen(FileName));
            BlobPath := FolderName + FileName;
            CheckIfDuplicateFileExist(BlobPath, FileName);
            ABSBlobClient.PutBlobBlockBlobStream(BlobPath, InStr, GetMimeType(Extension));
            IntLinkAttachment(LinkAttachmentRec, BlobPath, FileName, Extension, IntegrationSetup); // Create Link Entry
        end;

        Message('%1 Files uploaded successfully.', Format(Files.Count));
    end;
Explanation
This procedure receives two parameters:
Files: List of [FileUpload]
This contains all files selected by the user.
var LinkAttachmentRec: Record "Link Attachment"
This is the custom record used to associate the uploaded files with the relevant Business Central transaction.
Get Integration Setup
IntegrationSetup.Get();
This retrieves the Azure Storage configuration from the custom Integration Setup table.
The access key is then retrieved:
AccessKeySecretTxt := IntegrationSetup."Access Key";
The access key is stored in a SecretText variable.
Create Authorization
Authorization := StorageServiceAuthorization.CreateSharedKey(AccessKeySecretTxt);
This creates Shared Key authorization using the Azure Storage access key.
Initialize Azure Blob Client
ABSBlobClient.Initialize(IntegrationSetup."Account Name", IntegrationSetup."Container Name", Authorization);
The ABS Blob Client is initialized using:
Azure Storage Account Name
Container Name
Authorization
After this, the Blob Client can communicate with the Azure Blob Storage.
Generate Folder Name
FolderName := GetFolderName(LinkAttachmentRec);
The GetFolderName() function generates the folder structure where the files will be stored.
Process Each File
foreach File in Files do begin
Since multiple files can be selected, the code loops through each uploaded file.
The file is converted into an InStream:
File.CreateInStream(InStr);
The file name and extension are then retrieved:
FileName := File.FileName;
Extension := FileManagement.GetExtension(FileName);
For example:
Invoice.pdf
will give:
FileName = Invoice.pdf
Extension = pdf
Create Blob Path
BlobPath := FolderName + FileName;
This combines the generated folder path with the file name.
Check Duplicate
CheckIfDuplicateFileExist(BlobPath, FileName);
Before uploading, the code checks whether a file with the same path already exists.
Upload to Azure
ABSBlobClient.PutBlobBlockBlobStream(BlobPath, InStr, GetMimeType(Extension));
This is the actual upload operation.
It passes:
Blob path
File stream
MIME type
After the upload is completed, a record is created in the custom attachment table:
IntLinkAttachment(LinkAttachmentRec, BlobPath, FileName, Extension, IntegrationSetup);
Finally, the user receives a message showing how many files were uploaded:
Message('%1 Files uploaded successfully.', Format(Files.Count));
3. GetFolderName
The next function creates the folder structure for the uploaded file.
 local procedure GetFolderName(LinkAttachmentRec: Record "Link Attachment"): Text
    begin
        exit(CompanyName + '/' + GetFinancialYear(LinkAttachmentRec."Transaction Date".Date) + '/'
             + Format(LinkAttachmentRec."Document Type")
             + '/' + Format(Delchr(LinkAttachmentRec."No.", '=', '/'))
             + '_' + Format(LinkAttachmentRec."Transaction SystemId"));
    end;
Explanation
This function generates a structured folder path based on information from the current transaction.
The path contains:
Company Name
Financial Year
Document Type
Document Number
Transaction SystemId
For example, the resulting path could look similar to:
Company/2026-27/Purchase Invoice/PI001_<SystemId>/
The use of:
Delchr(LinkAttachmentRec."No.", '=', '/')
removes / characters from the document number.
The SystemId is also included to make the folder more unique.
This gives each transaction its own logical location in Azure Blob Storage.
4. CheckIfDuplicateFileExist
Before uploading a file, the solution checks whether the same file already exists.
local procedure CheckIfDuplicateFileExist(BlobPath: Text; FileName: Text)
    var
        LinkAttachmentRec: Record "Link Attachment";
    begin
        LinkAttachmentRec.SetRange("File Path", BlobPath);
        if not LinkAttachmentRec.IsEmpty then
            Error(DuplicateErr, FileName);
    end;
Explanation
The function filters the custom Link Attachment table based on the generated Blob path:
LinkAttachmentRec.SetRange("File Path", BlobPath);
Then it checks whether a matching record exists:
if not LinkAttachmentRec.IsEmpty then
If a matching record exists, the upload is stopped:
Error(DuplicateErr, FileName);
This prevents the same file from being uploaded again to the same location.
5. GetMimeType
Different types of files have different MIME types. The following function returns the MIME type based on the file extension.
local procedure GetMimeType(Extension: Text): Text
    begin

        case Extension of
            'txt':
                exit('text/plain');
            'pdf':
                exit('application/pdf');
            'html':
                exit('text/html');
            'csv':
                exit('text/csv');
            'json':
                exit('application/json');
            'jpg', 'jpeg':
                exit('image/jpeg');
            'png':
                exit('image/png');
            'docx':
                exit('application/vnd.openxmlformats-officedocument.wordprocessingml.document');
            'xlsx':
                exit('application/vnd.openxmlformats-officedocument.spreadsheetml.sheet');
            else
                exit('application/octet-stream'); // Default
        end;
    end;
Explanation
Why GetMimeType() is Required
The GetMimeType() function is used to specify the correct MIME type of the uploaded file when storing it in Azure Blob Storage.
This is particularly important when the file is accessed later from a browser. If the correct MIME type is not provided, the browser may not recognize the file type correctly and can automatically download the file instead of displaying it as a preview.
With the correct MIME type, supported files such as PDF, images, and HTML files can be opened or previewed directly in the browser, depending on the browser and file type, instead of always triggering a download.
In the upload code, the MIME type is passed to Azure here:
ABSBlobClient.PutBlobBlockBlobStream(BlobPath, InStr, GetMimeType(Extension));So, GetMimeType() helps ensure that Azure stores the file with the appropriate Content-Type, which is important for the correct browser behavior when the file is accessed later.
6. IntLinkAttachment
After the file has been successfully uploaded to Azure Blob Storage, this function creates the corresponding record in Business Central.
 local procedure IntLinkAttachment(var LinkAttachmentRec: Record "Link Attachment"; FolderPath: text; FileName: Text; Extension: Text; IntegrationSetup: Record "Integration Setup")
    begin
        LinkAttachmentRec.Init();
        LinkAttachmentRec.ID := 0;
        LinkAttachmentRec.Validate("File Name", CopyStr(fileName, 1, MaxStrLen(LinkAttachmentRec."File Name")));
        LinkAttachmentRec.Validate("File Extension", Extension);
        LinkAttachmentRec.URL := StrSubstNo(IntegrationSetup."Base URL", IntegrationSetup."Account Name", IntegrationSetup."Container Name", FolderPath);
        LinkAttachmentRec."File Path" := FolderPath;
        LinkAttachmentRec.Insert(true);
    end;
Explanation
The file name is stored in the custom table:
LinkAttachmentRec.Validate("File Name", CopyStr(fileName, 1, MaxStrLen(LinkAttachmentRec."File Name")));CopyStr() is used to ensure that the file name does not exceed the maximum length of the table field.
The file extension is stored:
LinkAttachmentRec.Validate("File Extension", Extension);Next, the Azure Blob URL is generated:LinkAttachmentRec.URL := StrSubstNo(IntegrationSetup."Base URL", IntegrationSetup."Account Name", IntegrationSetup."Container Name", FolderPath);The file path is also stored:
LinkAttachmentRec."File Path" := FolderPath;Finally, the attachment record is inserted:
LinkAttachmentRec.Insert(true);Therefore, the actual file remains in Azure Blob Storage, while Business Central maintains the information required to identify and access the file.
How the Complete Solution Works
The complete upload process can be understood as follows:
User selects files → Upload Files Action → FileUpload List → Get Azure Storage Configuration → Create Shared Key Authorization → Initialize ABS Blob Client → Generate Folder Path → Loop through selected files → Create InStream → Get File Name & Extension → Check Duplicate → Upload File to Azure Blob → Create Link Attachment Record → Store File URL and File Path in Business Central.
Conclusion
With this approach, Business Central does not need to store the actual file content. Instead, Azure Blob Storage stores the files, while Business Central stores the relevant metadata such as the file name, extension, path, and URL.
This approach can be useful when building custom attachment functionality where documents need to be stored externally while still being accessible from Business Central.
The solution also supports multiple file uploads, duplicate checking, MIME type handling, and transaction-based folder organization.
What's Next?
This blog covered the upload functionality.
In the next blog, I will cover the download functionality — how to retrieve the file from Azure Blob Storage and allow the user to download/open it directly from Business Central.
So, stay tuned for the next part! 🚀