
 Business Central Bytes
Calling REST APIs in Business Central AL: A Beginner's Guide to GET and POST
Share this Article
In this Article
- 1.GET vs. POST, in One Line
- 2.Part 1: Making a GET Request
- 3.Variables you'll need
- 4.The five-step flow
- 5.Full example
- 6.Part 2: Making a POST Request
- 7.The six-step flow
- 8.Full example
- 9.What About Authentication?
- 10.Mistakes Beginners Commonly Make
- 11.The Full Integration Flow, Once Auth Is Involved
- 12.Where to Go from Here
Share this Article
In this Article
- 1.GET vs. POST, in One Line
- 2.Part 1: Making a GET Request
- 3.Variables you'll need
- 4.The five-step flow
- 5.Full example
- 6.Part 2: Making a POST Request
- 7.The six-step flow
- 8.Full example
- 9.What About Authentication?
- 10.Mistakes Beginners Commonly Make
- 11.The Full Integration Flow, Once Auth Is Involved
- 12.Where to Go from Here
If you've ever needed to connect Business Central to a payment gateway, a CRM, or an e-commerce platform, you've probably hit the same wall: at some point, you need to send a GET or POST request, and the AL syntax for it isn't always obvious.
This guide is for you if you're comfortable writing basic AL but haven't worked with HttpClient yet. We'll build both a GET and a POST call from scratch, using a free public sandbox API — JSONPlaceholder — so you can test everything safely before touching a real API.
GET endpoint:
https://jsonplaceholder.typicode.com/posts/1POST endpoint:
https://jsonplaceholder.typicode.com/posts
JSONPlaceholder doesn't store or affect real data, and it requires no authentication — which makes it ideal for learning the flow before authentication enters the picture.
GET vs. POST, in One Line
GET asks the server for data. Think: get customer details, get exchange rates, get a sales order. It never changes anything.
POST sends data to the server to create something new. Think: create a customer, submit an invoice, place an order.
Part 1: Making a GET Request
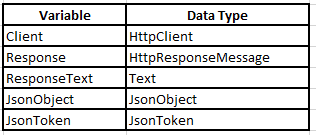
Variables you'll need
The five-step flow
1) Send the request.
if Client.Get('https://jsonplaceholder.typicode.com/posts/1', Response) then2) Check it succeeded — always, before doing anything else.
if Response.IsSuccessStatusCode() then3) Read the response body as text.
Response.Content.ReadAs(ResponseText);4) Parse the text into a JsonObject.
JsonObject.ReadFrom(ResponseText);5) Extract the value you need.
   JsonObject.Get('title', JsonToken);
   Message(JsonToken.AsValue().AsText());
Full example
procedure GetPost()
var
    Client: HttpClient;
    Response: HttpResponseMessage;
    ResponseText: Text;
    JsonObject: JsonObject;
    JsonToken: JsonToken;
begin
    if Client.Get('https://jsonplaceholder.typicode.com/posts/1', Response) then begin
        if Response.IsSuccessStatusCode() then begin
            Response.Content.ReadAs(ResponseText);
            JsonObject.ReadFrom(ResponseText);
            JsonObject.Get('title', JsonToken);
            Message(JsonToken.AsValue().AsText());
        end else begin
            Response.Content.ReadAs(ResponseText);
            Error('API call failed (%1): %2', Response.HttpStatusCode(), ResponseText);
        end;
    end;
end;
Notice the end else branch — if the call isn't successful, we read the error body and surface it instead of failing silently. More on why that matters below.
Part 2: Making a POST Request
The six-step flow
1) Build the JSON payload.
   JsonObject.Add('title', 'Business Central');
   JsonObject.Add('body', 'Learning REST APIs');
   JsonObject.Add('userId', 1);
2) Convert it to text.
JsonObject.WriteTo(JsonText);3) Load it into HttpContent.
Content.WriteFrom(JsonText);4) Set the Content-Type header — skip this and many APIs will simply reject the call.
   Content.GetHeaders(Headers);
   Headers.Remove('Content-Type');
   Headers.Add('Content-Type', 'application/json');
5) Send it.
Client.Post('https://jsonplaceholder.typicode.com/posts', Content, Response);6) Read the response — the server often returns something useful, like a generated ID.
   Response.Content.ReadAs(ResponseText);
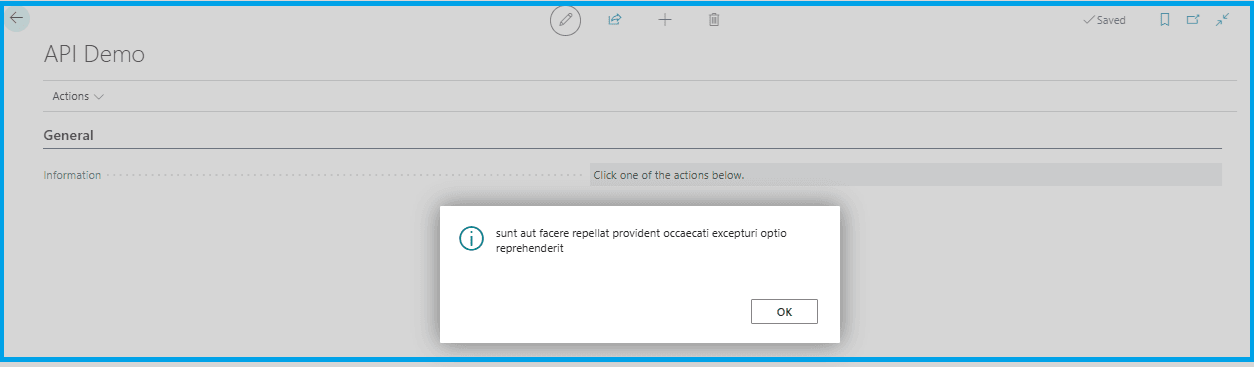
   Message(ResponseText);
Full example
procedure CreatePost()
var
    Client: HttpClient;
    Content: HttpContent;
    Response: HttpResponseMessage;
    Headers: HttpHeaders;
    JsonObject: JsonObject;
    JsonText: Text;
    ResponseText: Text;
begin
    JsonObject.Add('title', 'Business Central');
    JsonObject.Add('body', 'Learning REST APIs');
    JsonObject.Add('userId', 1);

    JsonObject.WriteTo(JsonText);
    Content.WriteFrom(JsonText);

    Content.GetHeaders(Headers);
    Headers.Remove('Content-Type');
    Headers.Add('Content-Type', 'application/json');

    if Client.Post('https://jsonplaceholder.typicode.com/posts', Content, Response) then begin
        Response.Content.ReadAs(ResponseText);
        if Response.IsSuccessStatusCode() then
            Message(ResponseText)
        else
            Error('API call failed (%1): %2', Response.HttpStatusCode(), ResponseText);
    end;
end;
What About Authentication?
JSONPlaceholder skips authentication entirely, but real-world APIs almost never do. You'll typically run into one of:
API Key
Basic Authentication (username/password)
OAuth 2.0 / Bearer Token
JWT
You handle these by adding a header before sending the request:
// Bearer Token
Client.DefaultRequestHeaders().Add('Authorization', 'Bearer YOUR_ACCESS_TOKEN');

// API Key
Client.DefaultRequestHeaders().Add('x-api-key', 'YOUR_API_KEY');
Header names differ between providers (Api-Key, Subscription-Key, X-API-Key, and so on) — always check the specific API's documentation rather than guessing.
Mistakes Beginners Commonly Make
Skipping the Content-Type header. Many APIs reject the request outright without
application/json.Not checking the status code. Always confirm
Response.IsSuccessStatusCode()before processing — don't assume success.Ignoring the error response body. Failed calls often include a useful message explaining exactly what went wrong; reading it saves debugging time.
Assuming every API returns the same JSON shape. Inspect the actual response structure before writing parsing code.
Forgetting the response matters even on success. A successful POST often returns a generated ID, status, or reference number your app needs to store.
The Full Integration Flow, Once Auth Is Involved
Read the API documentation.
Check whether authentication is required.
Obtain an access token or API key if needed.
Add the required authentication headers.
Prepare the request body (for POST/PUT/PATCH).
Send the request.
Check the status code.
Read the response.
Parse the JSON.
Handle any errors.
Where to Go from Here
Once this flow feels natural, you're ready to connect Business Central to real services — payment gateways, e-commerce platforms, ERP systems, CRM tools, and more. The pattern barely changes; only the authentication and payload shape will differ from one API to the next.
If you found this useful, a follow-up post on handling OAuth 2.0 token refresh in AL — one of the trickier parts of real-world integrations — might be a natural next read.